CHAPTER 2
|
|
CHAPTER 2
|
1 2 3 4 5 6 HOME | ||
| Campaigns | |||||
IN THIS CHAPTER
Introduction
Campaign Objectives
Capturing a Base
Anatomy of an Airbase
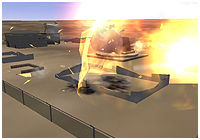
Recon Photos
FARPs
Base Efficiency, Damage & Repair
Base Supply Levels
2.1 Introduction - AH & CH Campaign Differences
There are three campaigns supplied with Enemy Engaged Comanche verses Hokum and three more if Apache Havoc is installed.
The new campaigns take place in smaller areas however the terrain mesh is more detailed allowing for more tactical masking opportunities. The entity AI and campaign flow logic is also improved. These improvements in logic and flow transfer to the older and much bigger Apache Havoc campaigns giving them a new lease of life.
Each campaign has a number of very specific objectives : on the campaign map, the SIT-REP screen displays the status of these objectives. Each objective requires the destruction or capture of the indicated base or facility.
Apache Havoc campaigns are different, these are mostly a war of attrition, requiring enemy force levels to be pounded below specific levels and sectors captured by flying into them. For more details on Apache Havoc campaigns see the Apache Havoc Strategy Guide. Or look on the StrategyGuide directory on the simulation CD.
All campaigns have a finite number of vehicles and aircraft. As they are destroyed, replacement vehicles or aircraft are requested from the reserves. Reserves "appear" in the 3D game world at special airbase buildings. This is covered in more detail later.
2.2 Campaign Objectives
To achieve campaign victory you need to accomplish a number of primary objectives which are different each time you start a campaign. Usually you are required to capture a specific enemy base or airstrip.
For example:
figure 2-1: Campaign Objectives and Force Balance
Clicking on an objective will switch to the map display so you can identify its location. On the campaign map, Objectives are marked by black border lines, see the following example.
Figure 2-2: Typical Objective IconYou won't find getting to some of the objectives easy. The large airbases are often heavily defended by surrounding military bases and deep inside enemy territory. Concentrate on nibbling away at perimeter defences, this clears the way for follow-up missions. Capturing surrounding FARPs can be beneficial as this can help establish a foothold from which to launch deeper probes into enemy territory. But avoid capturing non essential Military Bases, this can take valuable time and needlessly use up vital assets through combat losses which could be used on more pressing targets.
Overall, priority should be given to eliminating air defences (SAMs and FARPs) and driving towards the most heavily defended objective as early as possible. The most basic campaign is the desert based "Sword In The Sand".
Figure 2-3: Sword In The Sand, Blue Force pushThis shows the main Blue Force thrust, a succession of FARPs are captured, closing toward the target airbase deep in enemy territory.
2.3 Capturing A Base
Capturing a base requires three things:
Step 1
The base is attacked and severely damaged. A successful strike mission (either planned or opportunity) will generate a follow-up strike mission or a BDA (battle damage assessment) mission.
Step 2
Secondly, a follow-up BDA (recon) mission must confirm target is inoperative.
Step 3
Finally, a "Troop Insertion" mission is created. Once the troops land in the base, the installation is captured.
Large military airfields are sources of resupply and can bring a great deal of firepower down on any nearby FARPs you establish or capture.
Once BDA reconnaissance of a damaged base has been completed (and it must be successful) the capture mission will be scheduled. Of course there must be the appropriate helicopter assets available for the Troop Insertion; Red force will use Hinds, Blue force require Blackhawks. A scheduled Troop Insertion will remain unassigned until assets have been allocated.
Figure 2-4: The O.O.B bar will show waiting
Troop Insertion and other missions.To see if any insertion missions have been scheduled, on the map screen click the O.O.B button (above the Mission/Group selector) and scroll down the list for Troop Insertion (click on it to view the dust-off and LZ points on the map) or you can click on the
mission button right of the map and search for yourself.
Not all Troop Insertion missions are successful, the difficulty of capture is determined by the base "efficiency" level. The more damage done to a base, the lower the efficiency. See section 2.6 below for more details.
2.4 Anatomy of an Airbase
Damaging or capturing enemy air bases are vital for a successful campaign outcome. Not only are airbases typically primary objectives, but they are also the source of replacement aircraft, supplies and ground vehicles.
Begin the Engagement - Perimeter Defences
When you attack a base, your priority should be the surrounding SAM defences. It is wise to set your radar priority filter to HIGH on approach. This will pick out the SAM "triangles", kill all of them first. You will hear search radar warning tones when you begin to attack so make sure you attack from a maskable position - a place you can duck down and hide from incoming missiles.
Notes for engaging from a hover
Use Hover Hold to help maintain location, if you have a throttle controller, you can still operate this to move up and down. Move it GENTLY as excessive downward motion may not be correctable and upward motion may give you too much altitude and cause you to panic and drop the throttle - again causing a crash.
There is another version of Hover Hold called Stable Hover Hold, this overrides the throttle controller and maintains the altitude at moment it was engaged. Both version can take a little while for the flight computer to dampen out any motion. With EXPERT avionics they will only work when flying below 20 knots. Personally I prefer NOT to use the automatic flight assist modes but instead use the stick-trim (T and SHIFT T) to maintain a stable hover.
Key Airbase Buildings - Interior Assault
Once the perimeter air defence vehicles are destroyed proceed into the airbase perimeter.
Airbases have special buildings called "generators". These special hangers serve to resupply the campaigns operational pool of aircraft when they get shot down. The campaigns resource pool is a finite number of specific aircraft types for that theatre. The maintenance sheds serve as the "portal" between the aircraft pool and the 3D world. Occasionally you may notice helicopters or fighters emerging from the doors of these hangers.
- Vehicle Garage - spawns replacement land vehicles
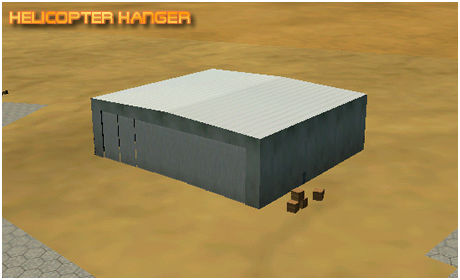
- Helicopter Hanger - replacement helicopters emerge from these
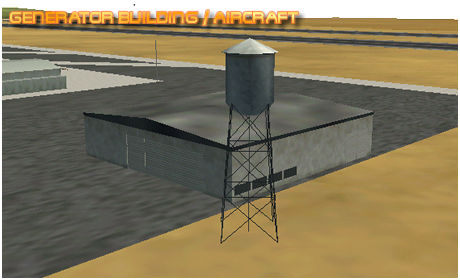
- Generator Building - replacement fixed wing aircraft
For such airfield busting missions I recommend the pilot arm their helicopter with as many rocket pods as they can fit. Rockets instead of air-to-ground guided missiles will do much more damage to an airfield. The smaller buildings can be damaged with just two standard Hydra rockets. Although hardened hangers may require two or three Hellfire or Vikhr ATGMs. Use your wingmen, order them to attack specific structures.
PRIORITY TARGET - VEHICLE GARAGE
If you can, locate and destroy the vehicle generator building as soon as possible. Once you have destroyed the airbases perimeter SAM vehicles or parked SAM vehicles, new SAM vehicles may emerge while you are nearby.
Reserve forces emerging from the vehicle garage will park up outside before driving off to join front-line forces.
PRIORITY TARGET - HELICOPTER HANGER
Destroy this and you will stop replacement helicopters arriving at nearby FARPs and in turn help protect your ground forces. They are typically found near the helicopter pads. For location examples, please refer to the recon photographs below
PRIORITY TARGET - GENERATOR BUILDING / AIRCRAFT SERVICE HANGER
These come in a variety of shapes but tend to be the larger buildings located near the runways or parking apron. They spawn replacement fighters and transport fixed wing aircraft from the reserve pool. Destroying these will hamper enemy air efforts.
Recon Photographs - (Lebanese Airfields)
As mentioned above, your priority targets are the vehicle respawn structures. These buildings are marked on the intelligence photos below.
The airfields shown here are fairly typical. There are many other base layouts including dirt strips in the campaign areas. Only three are presented below. Dirt strips do not have any generator buildings.
The "sector" is the map grid co-ordinate.
(The recon photos are standard screen-shots, colour desaturated with labels added by hand.)
2.5 FARPs Forward Area Refuelling Points
FARPS are easy pickings, mostly consisting of soft vehicles, mules and external power units that can be destroyed with the cannon. Even better if you can catch them with aircraft on the ground.
Although a single ATGM, Hellfire or Vikhr, directed at the fuel supply will take out about half the FARP. Locate a collection of small fuel tanks or a mule near a group of tents.
2.6 Base Efficiency, Damage & Repair
EfficiencyEach structure at a base (structures such as tents, trucks, hangers, mules etc.) contributes a certain amount towards the "efficiency" of the base. Structures like control towers and hangars are more important than tent or sheds etc.
When buildings are destroyed the efficiency of the base drops, and it requests a repair task. When the "engineers" arrive via the transport aircraft the base slowly starts repairing and the efficiency rises accordingly.
If the efficiency falls below a certain threshold (which just so happens to be 33%) then the base is considered "Out Of Action". When this happens the rate at which missions from that base are assigned is significantly decreased so it becomes less useful to the war effort.
The efficiency level also determines the outcome of troop insertion missions against a base. Not all troop insertion missions result in a successful capture. Basically, the lower the base efficiency the higher the probability of the base being captured. A fully repaired base will always manage to repel the invading forces, whereas an "Out Of Action" base will nearly always be captured. Troop Insertion missions are only generated against bases with low efficiency, but of course the base can repair itself quite a bit while the assault helicopters are en route.
Damage & Repair
Once a base (airbase or FARP) is damaged to the point where it is marked "Out Of Action", it will require special equipment to arrive by transport. Transports helicopters carry out these "Repair Missions". Once they have arrived, repairs will begin. The amount of time need to repair a base will vary, it depends on what has been damaged.
Individual items (tents, trucks, mules) require a certain amount of time to repair. A tent or shed takes 2 minutes, whereas a hanger or control tower takes 10 minutes. Repairs are done one at a time. A really badly damaged FARP may take 15 to 20 minutes to repair. A badly damaged airbase may take 1 or 2 hours.
2.7 Base Supply Levels
Whenever an aircraft lands at a base after a mission, fuel and ammo is removed from the base stores. When a base supply level drops below a certain value, it calls in a "Supply Mission".
Large transport aircraft located at the bigger airbases takeoff and drop supplies by parachute onto the base. Supply drops may be either of fuel OR ammo, not both. A base may require two drops to fully restock.
CAUTION
Do not use APU 95% cold start switch when the ambient temperature is above 0° F C-18° C). Use of this switch will reduce the power takeoff (PTO) clutch life drastically, and could cause premature failure of the clutch duplex bearing/needle bearing as well as main transmission accessory gear case component failure.
| Enemy Engaged - Comanche vs Hokum Strategy Guide | |||